Optimize Your Images to Make Your Website Load Faster!
There are a number of reasons why it’s important to optimize the images embedded in your website. First and foremost is user experience as nobody likes a slow loading website! Google has crunched the data on website loading times and user experience and has added this to their many ranking factors. Google wants a good experience for their users, and that means fast loading websites.
Although there are a lot of things you can do to speed up your website, generally, the main culprit are the images used on your website that is causing it to load slow. Running a website design company, I see websites embedding images 1 mb+ in file size all the time. Depending on the style and layout of your website, an image 250kb or less in size should suffice for most scenarios, even full page photos! The smaller the better.
What!? The smaller the better? Well, there is a caveat. The more you compress an image or reduce its quality in order to save on file size, the fuzzier and more unusable it will become. You’ll need to use your own personal judgement to decide just how much of a quality reduction you’re okay with. For example, if you’re a photographer highlighting your work in your portfolio, you probably don’t want low quality images.
Just to make sure you understand file sizes:
1,000KB = 1MB
1,000MB = 1GB
To put this into perspective for you, a photo taken with your smartphone could easily range in file
sizes from 100KB to 10MB. That’s one photo!
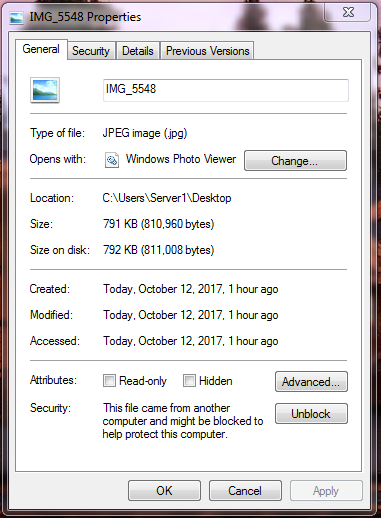
To view how large an image file is on a Windows machine, follow these steps:
- Right click on the image
- Click on “Properties” in the menu that opens
- Observe “Size” or “Size on disk” to get your file size
Another thing you’ll need to take into account is the actual dimensions of the image as this will drastically affect the file size itself. Whether you’re designing a website, adding photos to a portfolio, or just embedding a photo in an article, you’ll want to be mindful of common computer screen resolutions as well as the HTML code or framework you are working with.
Here are few scenarios with a bit of input:
Scenario 1: You’re creating a portfolio to highlight your photography. You may decide you want a popup when someone clicks on an image to show a higher resolution version. In this case, you’re going to want research common computer screen resolutions and be sure not to go too big, but big enough to accommodate users with above average screen sizes. There are other things you’d probably want to do as well, such as utilizing a Content Delivery Network (CDN) to speed up load times.
Scenario 2: You’re embedding a photo within an article. In this case, you’d most likely start by examining the code or DIVs that the content is in, and then setting the image size to stay within the DIV you are working with. In most scenarios, an image embedded within an article would be no wider than 1,000 pixels and probably more realistic, around 600 pixels in width or less.
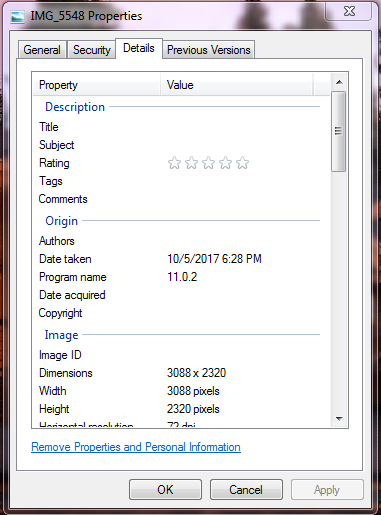
To view dimensions on a Windows machine, follow these steps:
- Right click on the image
- Click on “Properties” in the menu that opens
- Click on the “Details” tab in the window
- Observe “Dimensions” of the image.
In short, to optimize an image, we want to reduce its dimensions to the smallest that suites our needs by scaling and/or cropping. Then we want to save it as a JPG and reduce its quality to a level that we feel is acceptable.
So now that we understand the size an image should be on disk, you’re going to want to run some tests on your website in order to find the images that were not optimized correctly optimized during the design and build.
Watch this video on finding large files on your website and optimizing them using the Image Compressor by SimpleImageResizer.com.
Author:
Nathaniel Seeley
BlueSoft
602-888-9218
Wanted: Your opinions!